Windows
Adding a Windows node
A node is a machine that runs game servers. It runs the NGCP agent, which connects out to
the controller over mutual TLS. Adding a Windows node takes one command in PowerShell. What is
the same on every system (tokens, agent.yaml, managing nodes) is in Adding a
node.
Before you start
-
The node must reach the controller’s public URL (port 8080 or your HTTPS port) and the AgentLink address (port 8443). Check from the node:
Invoke-RestMethod https://panel.example.com/healthz Test-NetConnection panel.example.com -Port 8443 -
You need administrator rights on the node.
1. Create an enrollment token
- In the panel open Nodes and choose Add a node.
- Pick the datacenter (or create one inline) and type the node’s name.
- Keep the default validity of one hour (at most seven days).
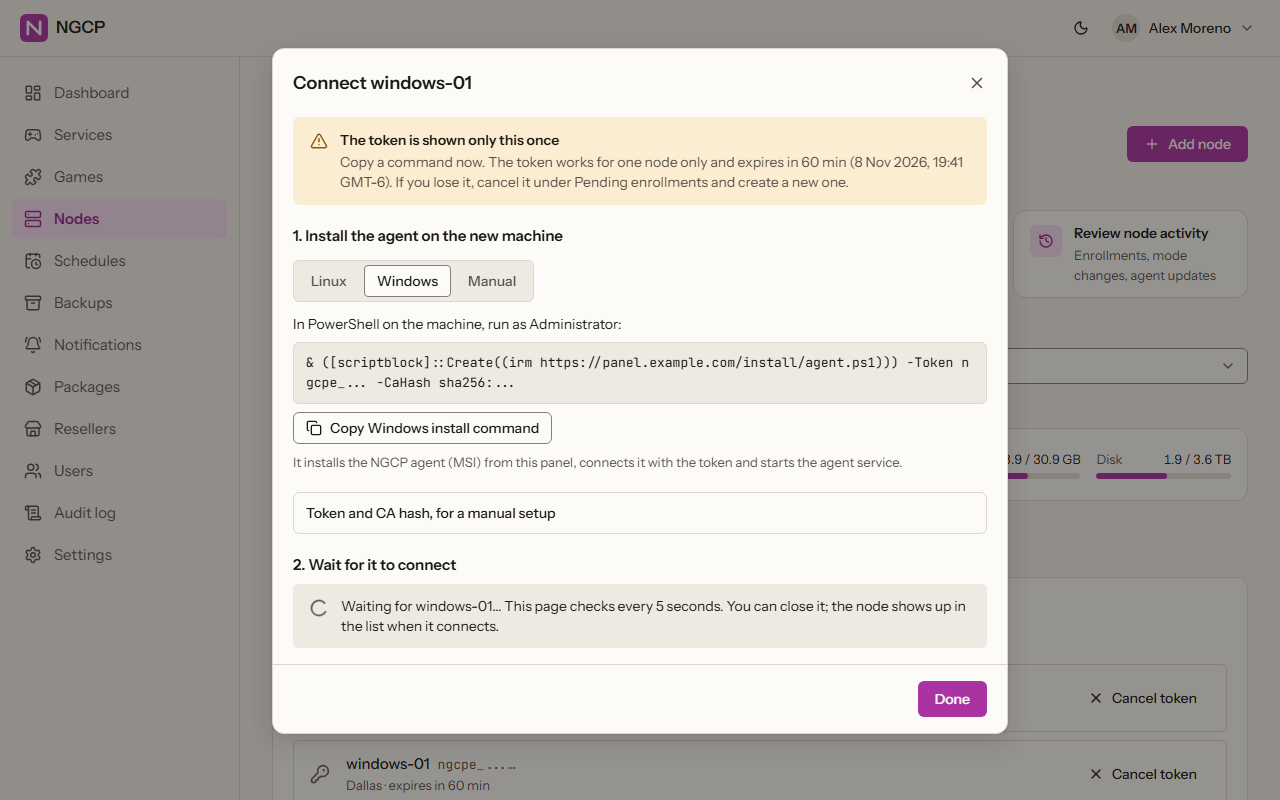
The panel shows the token once, together with the CA hash (sha256:...) and a ready-made
command for Windows. The token works one time only. More about tokens and the CA hash:
Create an enrollment token.
2. Run the one-line installer
The panel serves an installer script that downloads the agent package from the panel, checks its SHA-256, installs it and enrolls the node. In PowerShell as Administrator:
& ([scriptblock]::Create((irm https://panel.example.com/install/agent.ps1))) -Token ngcpe_... -CaHash sha256:...
Optional: -ServicesDir D:\games puts game servers somewhere other than the default.
The script is only as trustworthy as the connection to the panel: serve the panel over HTTPS.
3. Check
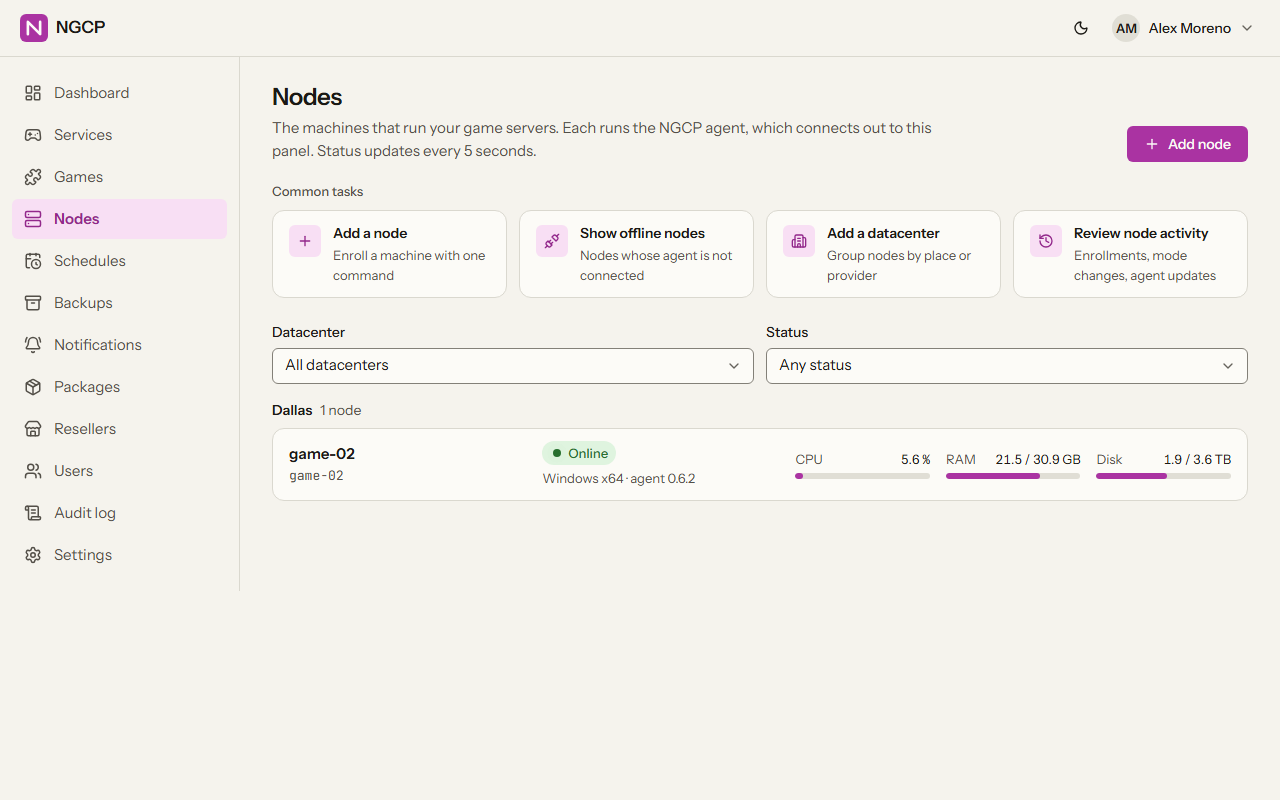
The node appears as Online within a few seconds and shows CPU, memory and disks. The first connection of a Windows node can take about 20 seconds; later connections are fast.
If it does not come online, see If the node does not come online.
With NGCP Setup
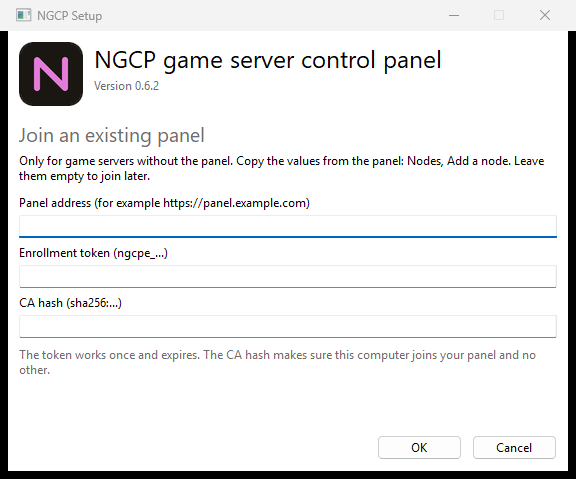
On another Windows computer, run NGCP-Setup-X.Y.Z.exe, tick only Game servers and enter the
panel’s address, the token and the CA hash under Options.
Unattended:
NGCP-Setup-X.Y.Z.exe /quiet InstallController=0 ControllerUrl=https://panel.example.com EnrollToken=ngcpe_... CaHash=sha256:...
On the panel’s own server no token is needed: see step 6 of the setup.
With the agent MSI
This MSI and the bare binary below install only the agent, not Microsoft’s game runtimes.
The Windows agent MSI can enroll during a silent install:
msiexec /i ngcp-agent-X.Y.Z-x64.msi /qn CONTROLLER_URL=https://panel.example.com ENROLL_TOKEN=ngcpe_... CA_HASH=sha256:... SERVICES_DIR=D:\games
The token is hidden from the MSI log. Without ENROLL_TOKEN the service waits for
ngcp-agent enroll, so the order does not matter.
With the bare binary
In PowerShell as Administrator:
mkdir C:\ngcp; cd C:\ngcp
# copy ngcp-agent.exe here
.\ngcp-agent.exe enroll --controller https://panel.example.com --token ngcpe_... --ca-hash sha256:...
.\ngcp-agent.exe service install
service install registers and starts the Windows service. Use
ngcp-agent service status|stop|start|uninstall to manage it. To replace an existing
enrollment, add --force to enroll.
What the agent creates
| What | On Windows |
|---|---|
| Service | NGCP Agent (NGCPAgent), LocalSystem, automatic start, restarts after 5 / 15 / 60 s |
Data folder (agent.yaml, certificate, private key, log, stored specs) |
C:\ProgramData\NGCP, SYSTEM and Administrators only |
| Game servers | C:\ngcp\services\svc-<id> |
| SteamCMD | C:\ngcp\steamcmd (owned by ngcp_steam) |
| Accounts | ngcp_s<id> per service, ngcp_steam for SteamCMD |
| Firewall | rule group NGCP svc-<id> per service, NGCP svc-0 for SFTP |
| Log | C:\ProgramData\NGCP\agent.log (local time) |
Windows Firewall
| Port | From | Opened by |
|---|---|---|
| Game ports of each service | Players | The agent, per service (rule group NGCP svc-<id>) |
| 2022/tcp (SFTP) | Your users | The agent (NGCP svc-0) |
| Outbound 8080 or 443, and 8443 | The node to the controller | Your network |
Switch firewall management off for a node in its settings if you manage the firewall yourself.
Next: your first game server. Running a Windows node day to day: Windows notes.